
Can You Replicate a Traditional German Pretzel with a Crunchy Crust and Soft Inside?
Pretzels are a staple in German bakeries, their twisted shape and crunchy, salty crust imparting a hearty snack with a long history. Yet, the most distinguishing feature of a German pretzel is its uniquely lye-kissed crust, giving it a dark, glossy finish and a robust flavor. But how does one replicate that in a home kitchen? Is it possible to create the same delightful contrast of a crunchy exterior and a soft, chewy interior? This article delves into the art and science of making traditional German pretzels, guiding you through each step required to achieve the authentic taste and texture right in your own kitchen.
The Pretzel Dough: The Foundation of a Good Pretzel
Creating a perfect pretzel begins with making the dough. The ingredients are simple: flour, water, salt, and yeast. The technique, on the other hand, requires some finesse.
A lire en complément : What Techniques Ensure a Perfectly Cooked Risotto with Wild Mushrooms?
Start by dissolving salt in warm water. Then, add the yeast and allow it to rest for a few minutes until it’s frothy. This is known as "proofing" the yeast, and it’s critical for ensuring the yeast is active. Next, gradually add the flour while stirring to incorporate. Once the dough begins to form, place it on a floured surface and knead until the dough is smooth and elastic.
One important tip to note is resting the dough. After kneading, let the dough rest for a few hours, covered, in a warm place. This resting period allows the yeast to ferment the dough, producing carbon dioxide gas which causes the dough to rise. It also helps to develop the gluten in the flour, which will give your pretzels their characteristic chewy texture.
En parallèle : What’s the Best Method for Making a Rich and Flavorful Beef Wellington?
Shaping the Pretzel: More than a Twist
The iconic pretzel shape is certainly part of its charm. Shaping the pretzel involves rolling the dough into long, thin ropes and then twisting them into the traditional pretzel shape.
Begin by dividing the dough into even pieces. Each piece should be rolled into a long rope, about 18 inches long. The center should be thicker, with the ends tapering off. Then comes the fun part: shaping the pretzel.
Form a "U" shape with the rope, cross the ends over each other, then twist them again. Flip the twisted ends back towards the center of the "U" shape and press down slightly to secure. This twist is what gives the pretzel its unmistakable shape.
The Lye Bath: The Secret to the Pretzel’s Dark Crust
Perhaps the most unique aspect of pretzel-making is the lye bath. This step is what sets a pretzel apart from other baked goods, giving it its unique flavor and color.
Before baking, each shaped pretzel is dipped in a solution of lye and water. Lye, or sodium hydroxide, is a strong alkaline substance. When the pretzel is baked, the lye reacts with the dough, enhancing the Maillard reaction – the same chemical reaction that gives browned food its distinctive flavor and color.
Though lye can be dangerous to handle, a safer alternative at home is baking soda. While it’s less alkaline than lye, a solution of baking soda and water will still give your pretzels a nice brown crust and a hint of that distinctive pretzel flavor.
Baking the Pretzel: The Final Step
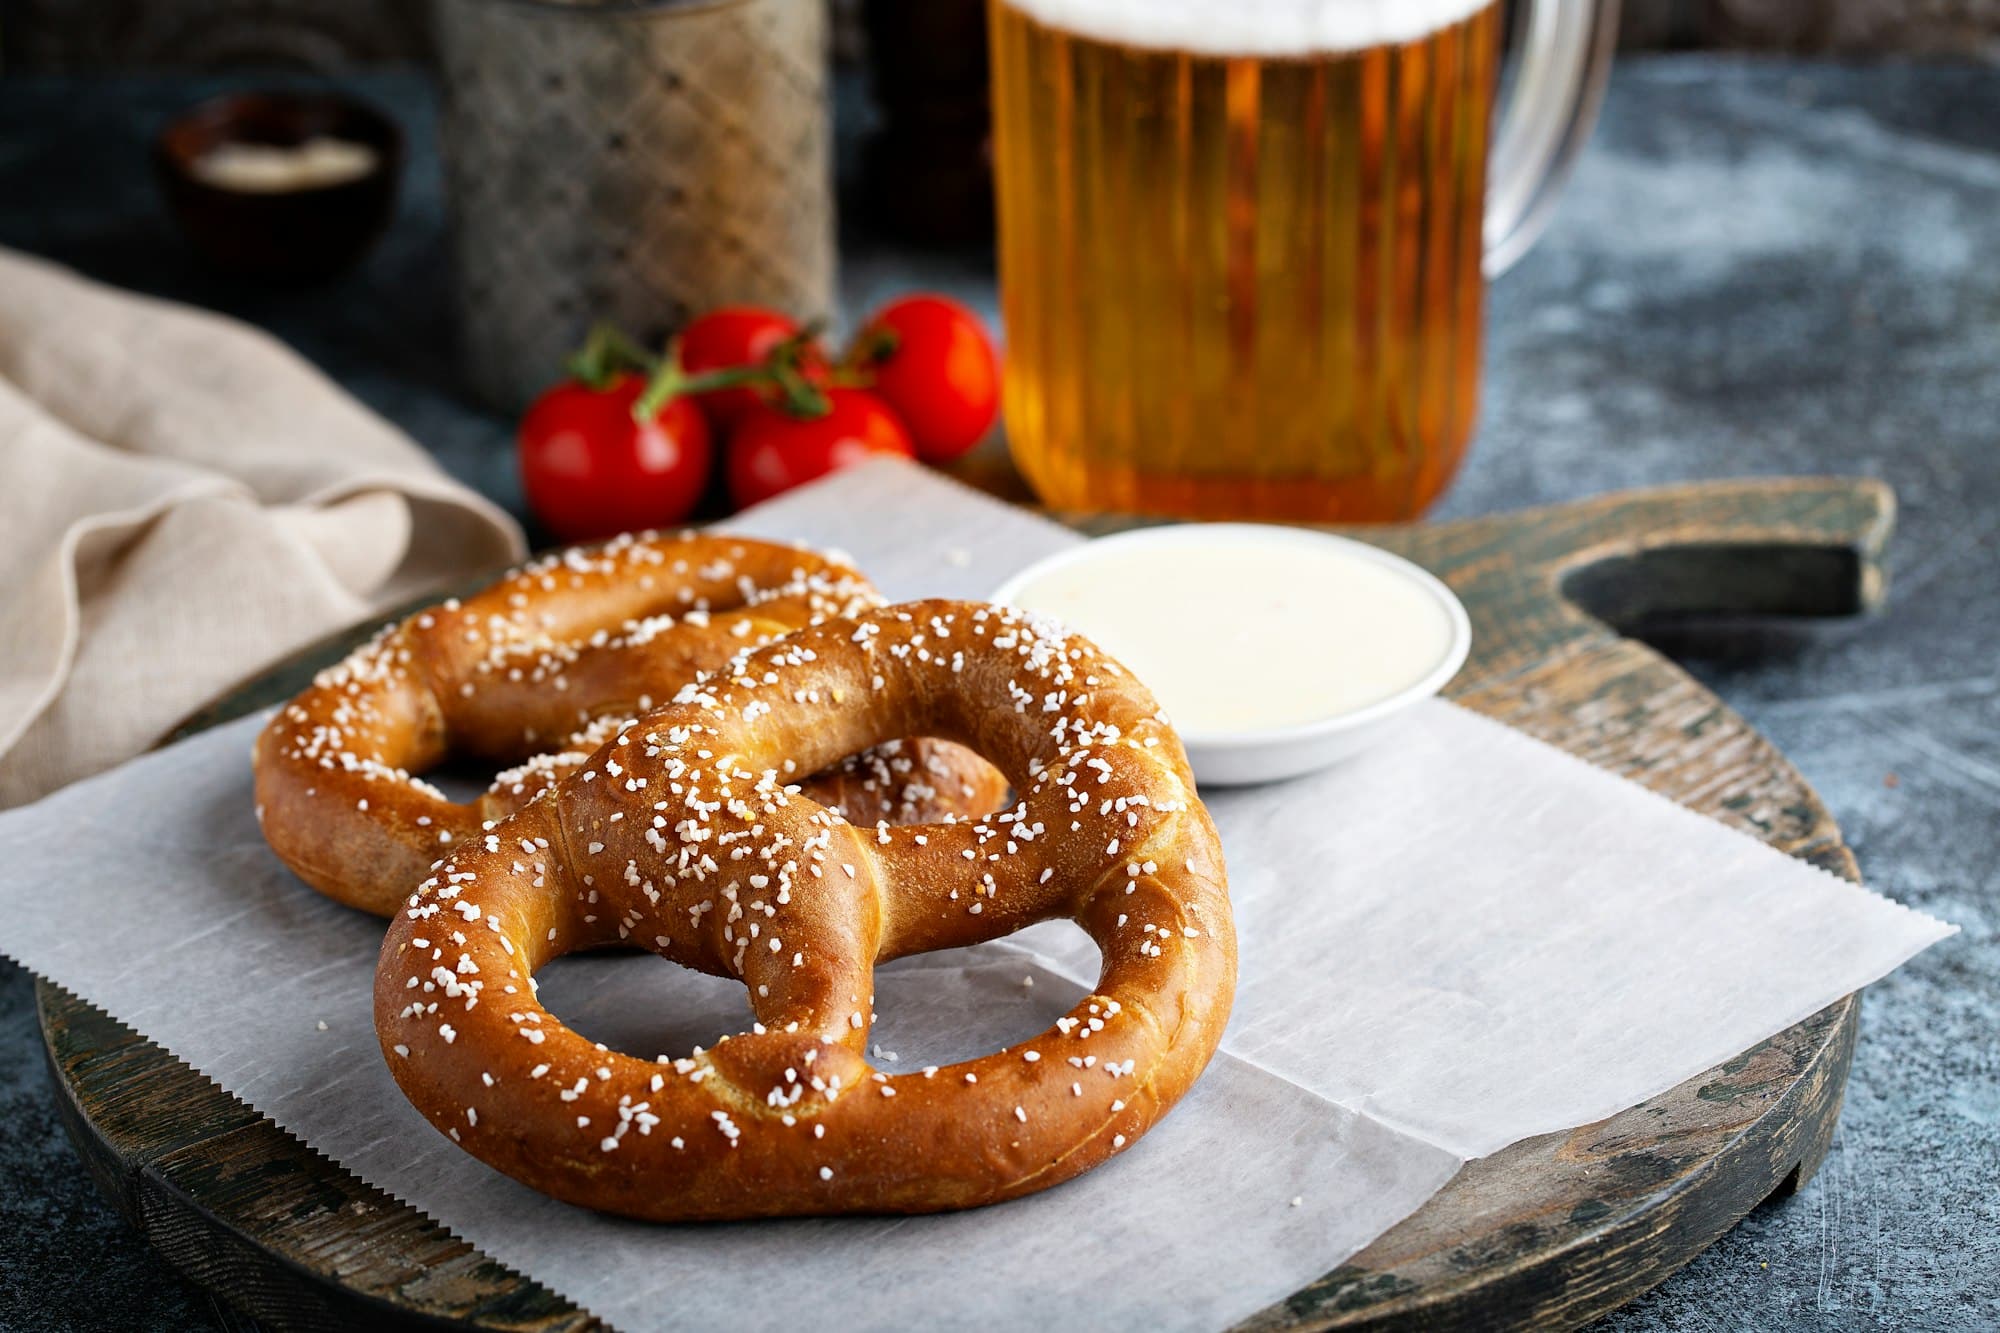
After the lye bath, the pretzels are almost ready for the oven. But first, they are sprinkled with coarse salt which not only adds flavor but also gives the pretzels their characteristic crunch.
Baking the pretzels requires a hot oven – about 425 degrees Fahrenheit. This high heat helps to quickly set the crust, ensuring it’s crisp and brown while leaving the interior soft and chewy. Depending on the size of your pretzels, they will need to bake for about 15 to 20 minutes.
Halfway through baking, you may want to rotate your baking sheet to ensure even browning. Once the pretzels are a deep, golden brown, remove them from the oven. Brush with melted butter for added flavor and a glossy finish.
Perfecting the Pretzel: Tips and Tricks
Making pretzels at home can be a fun and rewarding experience. But like any baking endeavor, it takes practice to perfect.
Firstly, remember that the quality of your ingredients matters. Use a good quality flour and fresh yeast for the best results. Secondly, don’t rush the resting or rising times. This is what gives the pretzel its texture and flavor.
When shaping your pretzels, don’t stress if they’re not perfect. It takes some practice to get the twist just right. And finally, when baking, keep an eye on the color of your pretzels. The key is to achieve a deep brown without burning.
The Role of the Baking Sheet and the Lye Bath
As we delve deeper into the making of German pretzels, the baking sheet’s role and the lye bath become pivotal. Once your pretzel dough is shaped and beautifully twisted, it’s time to prep your baking sheet. This is a crucial tool in ensuring your pretzels don’t stick to the surface while baking.
Lining the baking sheet with parchment paper can come in handy here. Not only does it prevent sticking, but it also makes the cleanup process much easier. However, while parchment paper is generally a safe choice, it’s worth mentioning that a heavy-duty stainless steel baking sheet can offer a more even heat distribution, leading to a more uniformly browned pretzel crust.
Now let’s talk about the lye bath. While commercial bakeries use food-grade lye, also known as caustic soda, it can be quite hazardous to handle at home. This powerful alkali, if not dealt with correctly, can cause burns, and its fumes can irritate the eyes and respiratory system.
Thankfully, there’s a safer alternative: a baking soda bath. Dissolving baking soda in hot water creates a safer alkali bath for your pretzels. While it won’t give quite the same deep brown color as lye, it’s a safer option for the home baker and will still lend your pretzels a lovely golden hue.
Regardless of whether you’re using a lye or soda bath, remember this step cannot be skipped. The alkali bath is what gives those German pretzels their umami-rich, slightly tangy flavor and helps create the crispy crust we all crave.
The Importance of the Ingredients: Flour, Salt, and Barley Malt
The ingredients used can have a significant impact on the outcome of your pretzels. It all starts with the flour. For the classic German pretzel, all-purpose flour is the best choice. It strikes the right balance between protein and starch, leading to a good rise and an enjoyable chewy texture.
Now, let’s talk about salt. Typical table salt won’t cut it here. You need to use pretzel salt, also known as coarse salt. This type of salt doesn’t dissolve as quickly during baking, allowing those characteristic white specks to remain visible on the pretzel’s dark crust. It also imparts a delectable crunch and a perfect hit of saltiness with every bite.
Lastly, let’s not forget the secret ingredient: barley malt syrup. This sweet, thick syrup adds depth to the dough’s flavor and enhances the browning of the pretzels during baking. If you can’t get your hands on barley malt syrup, brown sugar or honey work as decent substitutions, but nothing quite compares to the authentic flavor barley malt syrup delivers.
Conclusion
In conclusion, yes, you can replicate a traditional German pretzel with a crunchy crust and a soft center in your home kitchen. It takes a bit of patience and practice, but the result is undoubtedly worth it. From making the pretzel dough to shaping it, preparing the baking soda or lye bath, all the way down to the baking process, each step is integral to creating that authentic German pretzel experience.
Remember, it’s all about precision and care. Use fresh, high-quality ingredients. Don’t rush the rising times. Be careful when working with lye or baking soda. And most importantly, enjoy the process. There’s nothing quite like the satisfaction of biting into a warm, homemade pretzel, knowing it’s the product of your effort and skill. Happy baking!